
What you need:
2 yards light or medium weight cotton fabric
1 yard Insul-bright
Velcro - the thicker the better, but I used 3/4 in. (I bought 36 in, but you probably only need half of that)
Batting

Lets begin!
Start by cutting 2 pieces of Insul-bright to the following sizes:
30" X 13" and 36" X 11
Then you will need to cut 2 pieces of fabric to match each piece of Insul-bright. (So you are cutting 4 pieces of fabric total.) To save time, just cut the fabric slightly larger than the Insul-bright and trim the excess fabric later.
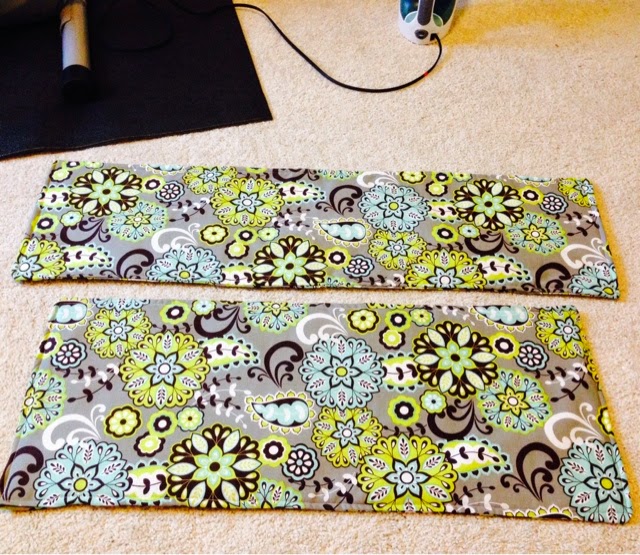
Gather the 30" X 13" Insul-bright and the 2 pieces of corresponding fabric.

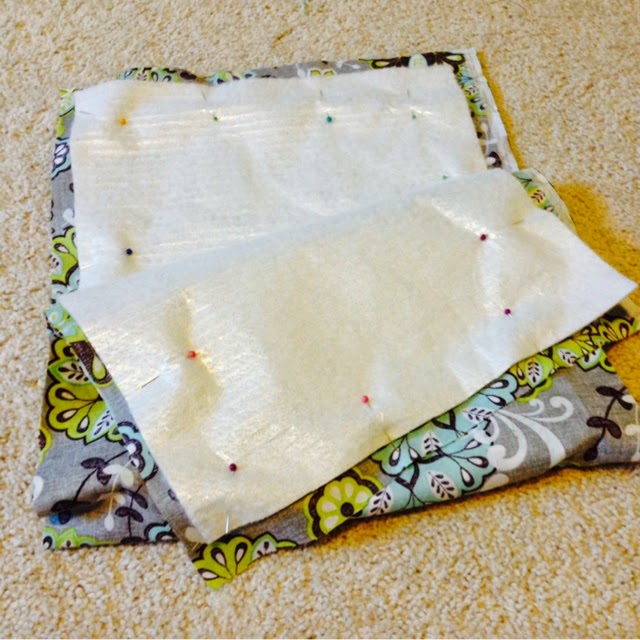
If there is a lot of excess fabric, go ahead and trim that now. Then pull the fabric through the opening so it is right side out.
Iron and push out the corners so that they are pointed. Now top stitch around the entire piece of fabric. This will stitch up the 2"-3" opening that you left before.
Repeat with the 36" X 11"

Pieces should look like this now.
Set those aside for now and let's make the straps.
Cut 4 pieces of fabric 40" X 2 1/2"
Cut 2 pieces of batting the same size.
Layer them just like before: Pretty sides facing and the batting on the top. Pin and sew along long sides - don't worry about the short sides. Flip right side out, iron flat, and top stitch along the long sides. They should look like this.

Now it's time to attach the straps to the 30" X 13" piece that you created earlier. If you look at the first picture, you only want your straps to be attached so far so it hangs correctly and doesn't go on top of the dish. I took the 30" X 13" piece of fabric and wrapped it around my casserole dish to estimate where to stop my straps. Here is what I came up with. You need to stop sewing 8 1/2" from each side and your strap should lay within 3" from the edge...see photo.

Also, the top part (when looking at this photo) of the strap should be 3" from the bottom. I laid everything out and then pinned it. I did the same thing with the other strap using the pins as my guide where to stop sewing. Then sew both straps on. Use the top stitch that you did on the straps as your guide and just stitch right over those. These will be seen on the bottom of the carrier, so try and make it as neat as possible. Remember to stop at your last pin so you don't go too far.

Now it's time to attach the 30" X 13" to the 36" X 11". The 30" X 13" with the straps attached goes on the bottom with the straps on the very bottom. Just line them up and measure to get them in the center of each other.


Pin everything together and then sew away. Again, I used the top stitch on these pieces as my guide and just stitched right over them. Again, these will be seen, so make it as neat as possible.
*try not to accidently slide the strap under the needle on the sewing machines a you are sewing these two things together! You will have to pull all the stitches out and redo that line! As you can probably guess...that happened to me!

Now time to attached the Velcro!
Put a casserole dish inside and pin Velcro in place. You might have to play around a bit to get it exactly where you want it.
I placed the Velcro in 4 places so it velcros twice when closing. Sew the Velcro on.

The last step is the handles. I added little padded pieces to the straps to make the handles. Cut two pieces of fabric 6 1/2" by 5 1/2" and cut two pieces of batting 6 1/2" by 5 1/2"

Repeat with second handle.


Enjoy your new casserole dish carrier that's just your style!! I know it seems like a lot of steps, but it is fairy easy! Shouldn't take more than 3-4 hours. I just put on a good movie and started working! Time flies when you're having fun!
No comments:
Post a Comment